Mike's Baking on Channel 4

Check me out on Baking Mad with Eric Lanlard!

Muffin Mondays

Check out all the yummy Muffin Monday recipes.

Take the challenge: Live Below The Line

I am taking the challenge and going to Live Below The Line from May 7th - 11th. Join me!

CAKE!

Check out the yummy cake recipes!

Cupcakes!

Check out all the yummy cupcakes!

New Addition to the Family: Mickey

Here is the newest addition to our family, Mickey!! We have had him for about a month now and he is settling in very well. I want to make some pupcakes for the pups and found this recipe. It sounds pretty good for them but wanted to see if anyone out there has a recipe that they have tried out or could recommend.


Mickey showing off!

Test Kitchen: Frosting Part 2

I originally posted some different styles of frosting back in July. Here are 2 new ones I tried the other day.
Which one do you like?

National Cupcake Week: Very Chocolatey Cupcakes with Marshmallow Buttercream Frosting

So, I finally got a chance to make some cupcakes this week. Wish I could have made some everyday for National Cupcake Week but I have been too busy! My friend from work, Becca, is moving to Australia and she had a leaving party last night. I wanted to make some cupcakes for her so I quickly whipped up 24 very chocolatey cupcakes with marshmallow buttercream frosting. I used the Hummingbird Bakery basic chocolate cupcake recipe but the batteries died on my scale as I was measuring the cocoa powder, so I have no idea how much cocoa I actually put in the cupcakes! It was more then the recipe called for, hence the new name very chocolatey cupcakes. I also tweaked the buttercream frosting recipe. The cupcake recipe can be found in the Hummingbird Bakery: Cake Days book, it is full of lovely and tasty recipes! Here is my recipe for the marshmallow buttercream frosting.

Recipe
Inspired by Hummingbird Bakery
Ingredients:
500g icing sugar
160g unsalted butter
2Tbs whole milk
1Tbs marshmallow syrup
1/2tsp vanilla extract

Steps:
  1. Put all ingredients into a large mixing bowl except the icing sugar. 
  2. Slowly add in the icing sugar in 3 batches, mix in very well! 
  3. Ready to frost 12 cupcakes.


Blueberry Muffins with Yoghurt Icing


I was sent a lovely package from www.mybakes.co.uk a few weeks ago and I have been wanting to try out the items ever since. Today, I decided to bake Blueberry Muffins and use the Simply Melt Yoghurt Buttons sent to me. On the back of the package was a recipe for Blueberry Muffins and I thought I would try that out too. So, are you wondering what I thought of the yoghurt buttons?! They made a lovely icing for the muffins, great flavour and a nice addition to blueberry muffins. The recipe for the blueberry muffins was very good as well. I will definitely be using this recipe and the yoghurt buttons again, just need to find a place that sells them! I think they might just have to send me some more, until I can find them locally. If you see them in your local shop, you should definitely give them a try. Or in the mean time, if anyone has a yummy yoghurt icing recipe to send me, I would love to try it out.
Recipe 
Inspired by mybakes.co.uk 
Ingredients:
2 eggs
240ml milk
120ml sunflower oil
1 teaspoon vanilla extract
200g granulated sugar
375g plain flour
4 teaspoons baking powder
1 teaspoon salt
175g blueberries
1 x Renshaw Yoghurt Simply Melt
Decorate with a few extra blueberries


Steps:
  1. Preheat the oven to 200°C/400°F
  2. Place the eggs, oil, sugar, vanilla extract and milk in a large mixing bowl and quickly beat together.
  3. In another bowl, thoroughly mix the flour, salt and baking powder.
  4. Add the dry ingredient mix to the liquid, and roughly mix it in - it does not have to be absolutely smooth.
  5. Stir in the blueberries.
  6. Fill a muffin tray with paper muffin cases, and then fill each case to near the top with the muffin mixture.
  7. Bake the muffins for 25 minutes.
  8. Allow the muffins to cool before decorating.
  9. Melt Yoghurt Simply Melt following the guide lines on the packet and drizzle over the cooled muffins.
This completes number 32 of My 100 list!

Steak Slice with Broccolini

This is my second favorite way to have steak and I wanted to share the recipe with you. It's nice and quick and the only way I will make mine. My favorite steaks are grilled by my Dad and I'm not even going to attempt that as they will be no where near as good as his grilling. Since I don't have a nice fancy grill like him, I use a grilling pan for my stove top and this recipe produces great steaks. This is my take on a Nigella Lawson recipe.

Recipe
Inspired by Nigella Express
Ingredients:
650g of 2.5cm thick Rump Steak
100ml Extra Virgin Olive Oil
Zest and Juice of 1 Lime
2 Cloves of Garlic, chopped
Good Handful of Coriander, chopped
2 Spring Onions, chopped
Juice of 1/2 Lemon
Salt and Pepper to your liking
200g Broccolini

Steps:
1. HEAT your grill pan to a very high heat. While it heats, cut away any fat from around the edge of the steak.

2. PREPARE the marinade for the steak, mix together the EVOO, lime zest/juice, garlic, and coriander  in a wide swallow dish.

3. GRILL the steak for two minutes on each side. Then place in the marinade for five minutes on each side. Juice the lemon into hot grill pan and let it bubble with the meat juices then pour over the marinating steaks. Season the steak with salt and pepper. Once you have marinated the steak, slice into thin strips.

4. STEAM the Broccolini for about 5-7 minutes. Once steamed, arrange on plate and put slice steak on top.

Yum!!

Rice BlogHop: Tiramisu Rice Pudding

Last month, I entered my Cake in a Mug to be part of a bloghop focused on cakes! My cake got quite a lot of "likes" and is now the most popular post on my blog. I was then emailed shortly after asking if I would like to participate co-hosting in the next bloghop, focused on rice. I wasn't sure to begin with as I had no idea what I would make with rice but with emails of encouragement from fellow bloggers and a good search on the net, I found a recipe! There are so many things you can make with rice, but I wanted to make something unique and that I have never heard of or had before. I came across a site with loads of all different rice recipes. I wanted to make a dessert so I had a browse and then I saw it... Tiramisu Rice Pudding! I had to make it. It is a really easy recipe to make and very yummy, quite a filling dessert and could easily serve 8 people. Enjoy with lots of whipped cream!


Recipe
Inspired by Riceland
Ingredients:
1 US cup uncooked long grain rice
2 1/2 US cups milk
1 Tbsp. instant coffee granules
1/4 tsp. salt
2 1/2 US cups fresh whipping cream
2 Tbsp. icing sugar
1/2 tsp. almond extract
1/2 tsp. vanilla extract
3/4 US cup marscarpone cheese
1/2 US cup sugar
2 Tbsp. coffee liqueur
Unsweetened cocoa powder


Steps:
  1. COMBINE in a medium sauce pan, the rice, milk, instant coffee, and salt. Stir occasionally until mixture has come to a boil, reduce heat to simmer, cover and cook for 15 minutes. Move to a large bowl, cover and refrigerate until chilled.
  2. WHIP 1 1/4 US cup of cream together with 1 tbsp icing sugar and 1/2 tsp almond extract, set aside. In another bowl, whip 1 1/4 US cup of cream together with 1 tbsp icing sugar and 1/2 vanilla extract, set aside.
  3. MIX together the chilled rice, almond whipped cream, marscarpone cheese, sugar, and coffee liqueur in a large serving bowl. Once thoroughly mixed together, cover with vanilla whipped cream. Sprinkle with cocoa powder. Cover and chill for at least an hour then serve.


Please join in on the #ricelove fun by linking up any rice recipe from the month of September.  Don't forget to link back to this post, so that your readers know to come stop by the #ricelove event. The twitter hashtag is #ricelove. Co-Hosted by: Baker Street, Bloc de Recetas, Bon a Croquer, Cafe Terra, Chef Pandita, The Daily Palette, Elephant Eats, Food Wanderings, Hobby and More, Knitstamatic, Mis Pensamientos, Simply Reem, The Professional Palate, The Queen's Notebook, The Spicy Rd.

Shane's 26th Birthday - Grape Poke Cake

So the past couple of weeks, I have been trying to figure what I was going to make for Shane's birthday. I was searching the net for something unique and came across the Poke Cake. I knew he would love it and I wanted to do it in his favorite flavor Grape. Luckily we had brought back some Jell-o from our recent trip to the States. The only item I couldn't find was White Cake Mix, which was fine, so I searched for a homemade version. There are so many out there and I didn't have time to test it out with the Poke Cake recipe so I decided on this White Butter Cake. The White Butter Cake was lovely but not the right cake for the Poke Cake recipe, you will see below in the pictures. The Jello just soaked right through the cake rather then staying in the poke holes. So it had the great flavor just not the the same streaky line effect. Does anyone have a recipe that replicates the Betty Crocker White Cake? Guess I will just have to do some more experimenting! Shane didn't seem to care as he loved the cake and has already had 3 big squares of cake! At the end of the day, that's all that matters!

Recipe  
Courtesy of KraftRecipes with my little tweaks
Ingredients:
1 pkg. white cake mix or use a homemade cake
1 US cup boiling water
1 pkg. (3 oz.) JELL-O Grape Flavor Gelatin
1/2 US cup cold water
300ml Whipping Cream
1 Tbs Icing Sugar
1/2 tsp Vanilla Extract
Handful of red grapes, chopped
Purple Glimmer Sugar

Steps: 
  1. PREPARE cake batter and bake as directed on package for 13x9-inch pan. Cool cake in pan 15 min. Pierce cake with large fork at 1/2-inch intervals. 
  2. ADD boiling water to gelatin mix in small bowl; stir 2 min. until completely dissolved. Stir in cold water; pour over cake. Refrigerate 3 hours. 
  3. WHIP the cream together with the icing sugar and vanilla extract. Frost the cake. 
  4. CHOP the grapes into quarters and put into a sandwich bag. Pour some purple glimmer sugar in the bag. Shake the bag up so the sugar sticks to the grapes. Scatter the covered grapes all over the frosted cake. 

Happy 26th Birthday, Shane!

Weekend Baking: Part 2 - Olive Bread Swirls

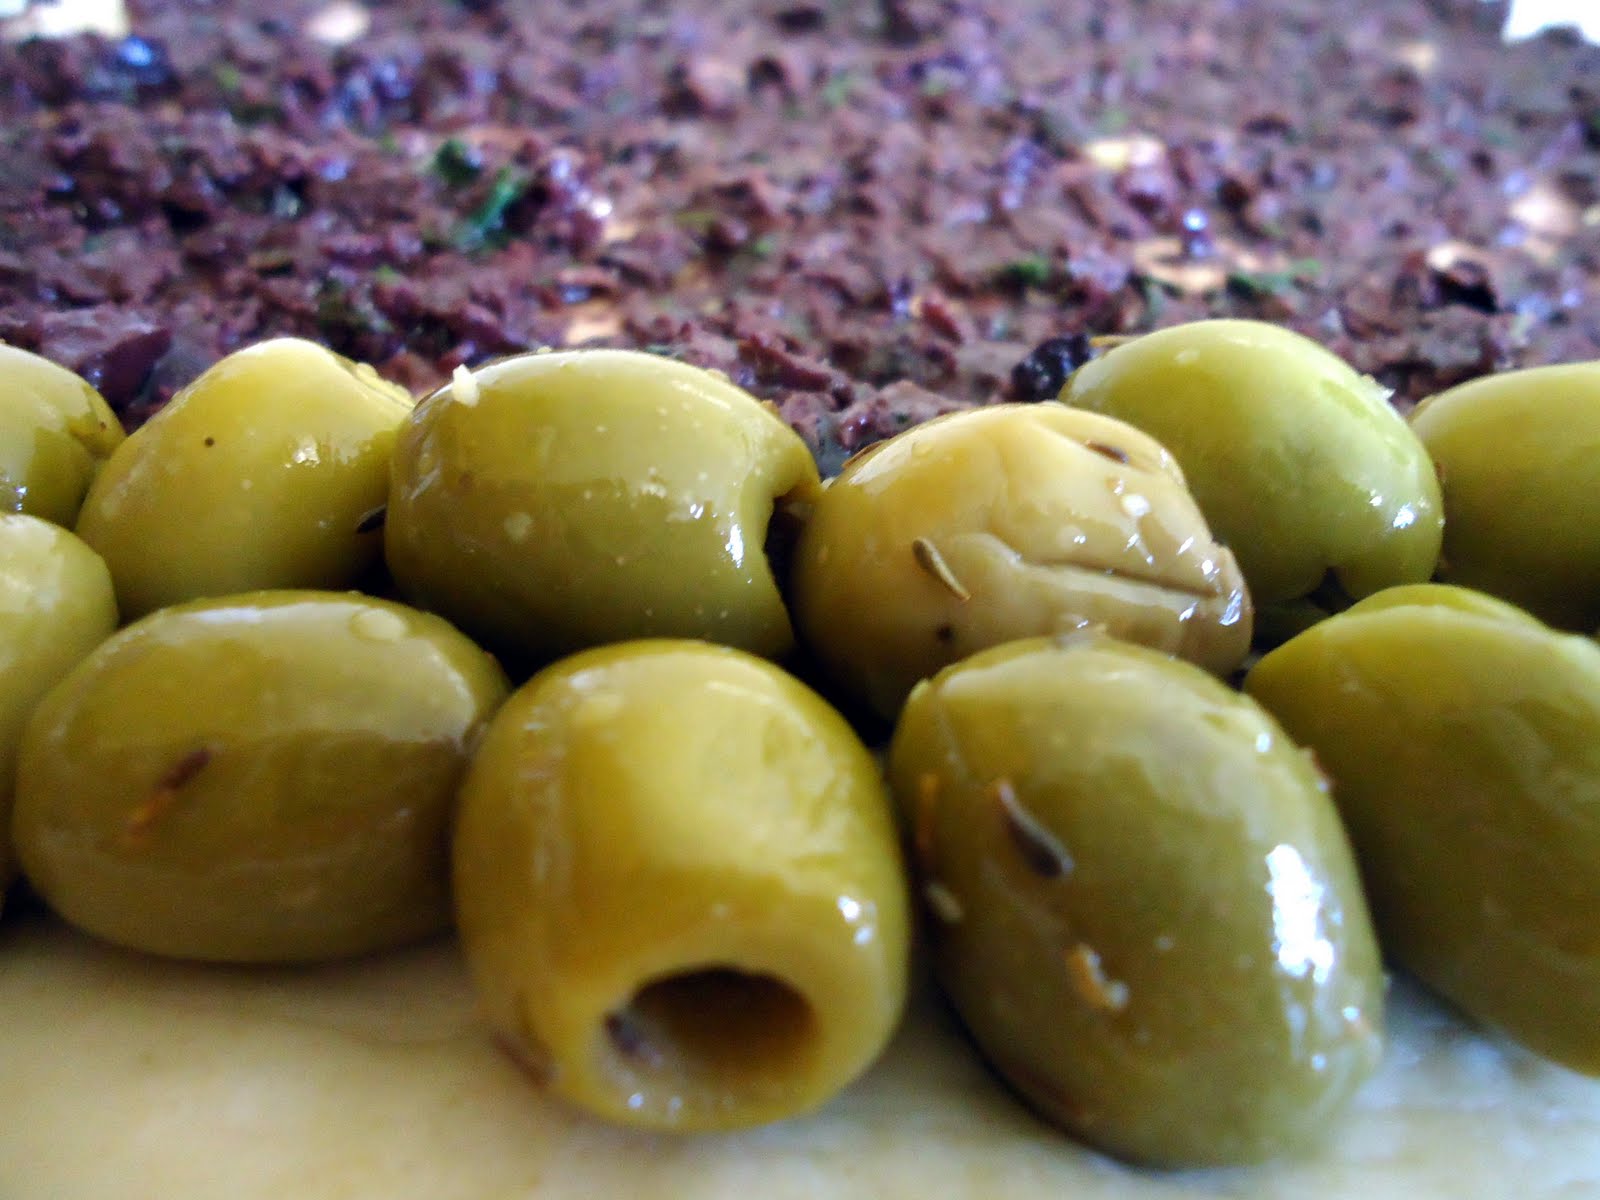
Even though this is part two of my weekend baking, I actually started making this first before the Cheesy Bonfire Bread. I loved the idea of it the moment I saw them on the BBC GoodFood site. They look just like cinnamon rolls but are a savory version called Olive Bread Swirls. I was a bit more worried about making this as it involved yeast and needed to sit around to rise quite a bit. I was afraid it wouldn't rise but as you can see in the picture that it did, in fact it doubled in size! As I don't have my stand mixer yet, I kneaded this for 10 minutes by hand. It reminded me of being a kid and playing with play-dough. I really enjoyed making it and watching it rise. I will have to practice the part where you roll the filling in it, to try to get more perfect swirls, but I was really happy with how they turned out. They tasted lovely straight out of the oven. It would be nice served with marinara sauce or some garlic butter to dip it in. This completes recipe 100 of "My 100" list.
Recipe
Courtesy of BBC GoodFood
Ingredients: 
500g strong white flour, plus extra for rolling
1 tsp salt
7g sachet easy-blend dried yeast 
6 tbsp extra-virgin olive oil, plus a little for brushing
small bunch of basil 
170g pitted kalamata olives (about 200g unpitted weight)
1 garlic clove, crushed 
50g pitted green olives 
Steps:
  1. In a large bowl, mix the flour, salt, yeast, 1 tbsp olive oil and 300ml warm water, to make a soft dough. Knead by hand for 10 mins or with the dough hook in a food processor or mixer for 5 mins. Put the dough back in the cleaned out mixing bowl, then cover the bowl with oiled cling film. Leave to rise for an hr in a warm place until doubled in size.
  2. Meanwhile, make the filling. Discard any tough basil stalks (leave tender ones on) and put in a mini food processor or hand blender beaker with the black olives. Add 4 tbsp olive oil, the garlic and the anchovies, if using. Whizz to a rough paste.
  3. Heat oven to 220C/200C fan. Line a shallow baking tin about 30 x 20cm with non-stick paper. On a floured worktop, roll out the dough to a rectangle roughly 30 x 40cm. Spread the olive paste all over and arrange the whole green olives in a line down one of the short edges. Roll up the dough like a Swiss roll, starting at the short olive-encrusted end to make a sausage shape.
  4. Cut the dough into 12 slices, then carefully lift each one into the tin, to make 4 rows of 3 swirl shapes. Lightly brush all over with the remaining olive oil. Loosely cover with cling film, then leave to rise for 20 mins or so, until slightly puffed up and filling the tin. Cook for 20-25 mins until golden, then leave to cool in the tin. 

Weekend Baking: Part 1 - Cheesy Bonfire Bread


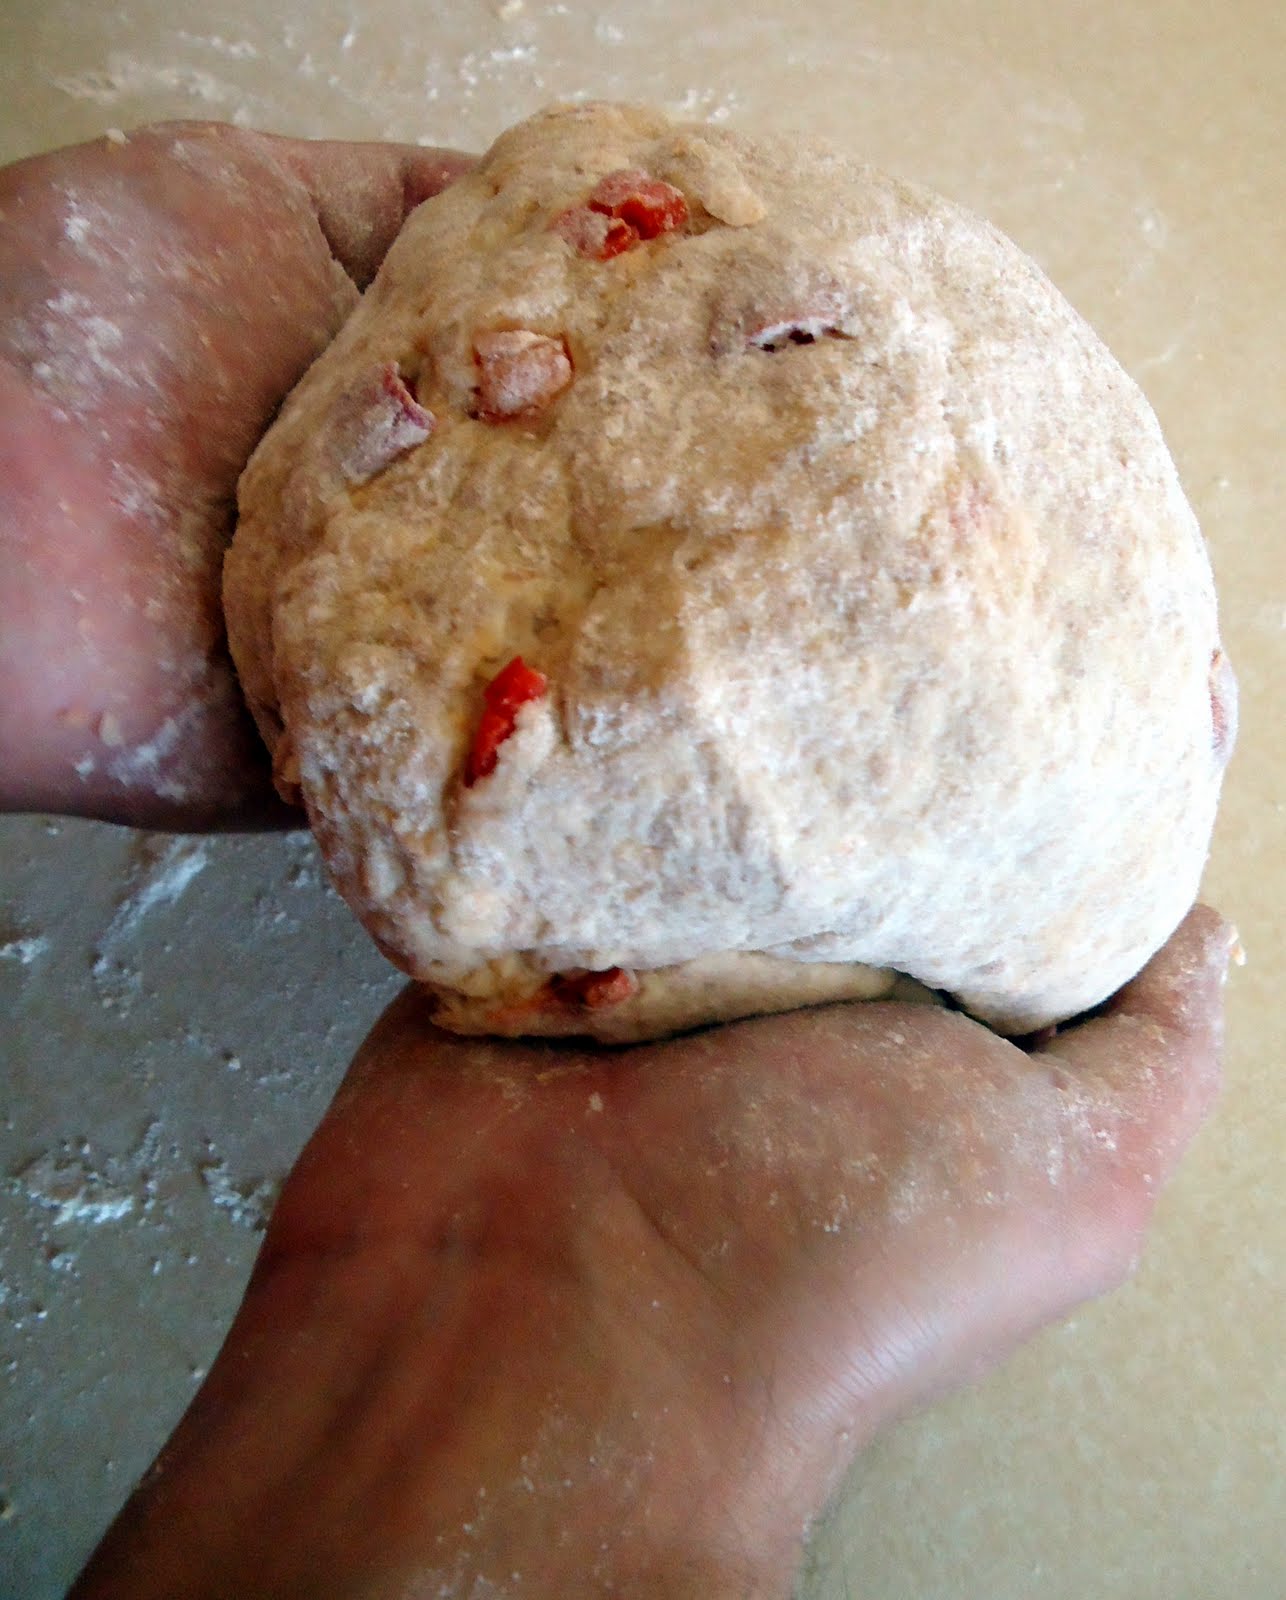
I decided to bake some bread recipes this weekend. I found two recipes on the BBC GoodFood website that I wanted to make ever since I added them to "My 100" list. We were having a chilled out evening with one of our friends and planned on snacking all night. They wanted a rustic type bread so I thought this Cheesy Bonfire Bread recipe would be great to try out. I had fun baking this one. The only other bread I have baked before was Banana Bread, which is a completely different process. I really enjoyed kneading the dough, mixing in the chargrilled peppers, cheese and pumpkin seeds.  It was very easy to make and the flavour was great. It tasted great with some onion chutney spread on it. I will be making this one again to enjoy by a bonfire or as we did last night by our chimnea. This recipe completes recipe 99 of "My 100" list.


Recipe
Courtesy of BBC GoodFood
Ingredients: 
200g wholemeal flour
200g plain flour, plus extra for dusting
1tsp bicarbonate of soda
2tsp cream of tartar
1tsp salt
25g butter, melted
300ml milk, at room temperature
175g cheddar, coarsely grated
3tbsp pumpkin seeds
85g chargrilled peppers from a jar, drained and chopped

Steps:
  1. Heat oven to 190C/fan 170C. Sift the dry ingredients into a large bowl and make a large well in the middle. Combine the melted butter and milk, then pour into the well. Mix to a soft dough.
  2. Dust the work surface with flour. Add most of the cheddar, 2 tbsp of the pumpkin seeds and the chopped peppers to the dough. Gently knead to combine on the floured surface. Divide into 8 lumps and shape into rough rounds two finger-widths deep.
  3. Place the pieces side by side on a floured baking sheet, scatter the remaining cheddar and pumpkin seeds over the top and bake for 30 mins until golden brown and the cheese is bubbling. Cool on a wire rack and eat while warm. BQVN4DD8UR7G

Cake Mug... again!


Shane loved last's night cake so much, that he made me make it again tonight! I had some caramel candy and decided to add those in. As you can see from the picture the caramel did not melt. The cake only cooks for a few minutes, so it was not long enough to melt the caramel. Next time I will chop the caramel up or make some fresh caramel sauce. The addition of fresh cream was really nice! This recipe is so easy and really good! This will be my go to recipe for when I need a little chocolate cake fix! What can I add to it next time?!

Recipe 


Vote for my mug cake on BakerStreet's bloghop at the bottom of this post!

Bake a Cake in a... Mug!

I received this tweet from one of my followers! I have heard of recipes to make a mug cake in the microwave but never tried making one. I sent this Molten Mug Chocolate Cake recipe to @fauxpaschick last night. She tweeted back later saying how great it turned out and is even going to add in different flavours. So I thought I should try the recipe out and see how it goes. Here is the result of my cake in the mug.


 Recipe
Courtesy of GoodFood BBC
Ingredients:
1 coffee mug
4 Tbsp. cake flour (plain, not self-rising)
4 Tbsp. sugar
2 Tbsp. cocoa
1 egg
3 Tbsp. milk
3 Tbsp. oil
Small splash of vanilla


Steps:
  1. Add dry ingredients to mug, mix well with a fork.
  2. Add egg, mix throughly.
  3. Pour in milk, oil and vanilla, mix well.
  4. Put mug into microwave and cook for three minutes on 1000 watts. Cake will rise over top of mug. Allow to cool for 2 minutes.

Mixed and ready for cooking

Just out of the microwave

Flipped onto plate and cooling

Ready to eat!


Not the prettiest cake but super easy to make and very tasty!! It tasted great on its own very moist and spongy. Next time I would maybe serve it with some cream and caramel drizzled on top, custard, or a dollop of peanut butter cooked in the center. This recipe is perfect for when you are craving cake and just want a small serving for 1! Try it out with your own modifications. Let me know how yours comes out!