Mike's Baking on Channel 4

Check me out on Baking Mad with Eric Lanlard!

Muffin Mondays

Check out all the yummy Muffin Monday recipes.

Take the challenge: Live Below The Line

I am taking the challenge and going to Live Below The Line from May 7th - 11th. Join me!

CAKE!

Check out the yummy cake recipes!

Cupcakes!

Check out all the yummy cupcakes!

Shane's Vegan Pancakes

This past Tuesday was Pancake Day in the UK and I was excited to make a vegan version with Shane. It wasn't until later in the day that I realized I had made plans with friends that night to go for a meal and catch a movie. I asked Shane if we could make them later in the week and the answer I got was "Nope, it's pancake day!". So, I missed out on trying these on actual pancake day but Shane made them again tonight with special toppings, one had peanut butter and bananas, and the other one had lots of berries. These pancakes are fluffy like the American ones and very yummy! I tried them on their own, just to make sure it wasn't the toppings that were making them so good but even with vegan butter these pancakes were tasty.  Try out the recipe below to make 4 large pancakes.

Recipe:
courtesy of VeganPancakes
Ingredients:
1 cup flour
2 tbsp baking powder
1 1/2 tbsp sugar
1/8 tsp salt
2 tbsp vegetable oil
1 cup soy milk
1 tsp ground cinnamon, optional


Steps:
  1. Take a medium bowl and combine flour, sugar, baking powder and salt. Add in the ground cinnamon if desired. Mix together well.
  2. Now add soy milk and oil to the above mixture. Mix well until the liquids are fully incorporated and the batter becomes smooth.
  3. Heat a large non-stick pan medium heat.
  4. Use a ladle and drop about 1/4 cup of batter at a time in the pan to form a pancake.
  5. When you see bubbles in the middle of the pancake, turn the pancake over with a spatula. Cook for a further minute or two and it should be done.

Strawberry Lime Mojito Loaf Cake

I recently did a product review and I wanted to make a recipe that could use the product I was testing out.  Last month, I made a Clementine Basil Mojito Loaf Cake and wanted to try it  out with different flavours. I decided that I wanted to use strawberries and thought it would pair well with the mojito flavours. It tasted great!! I loved it and the smells whilst making it were really nice. I preferred this one to the citrus one I made last time, you could really taste all the flavours separately yet mixing altogether in your mouth. I can't wait for summer and mojito drinks in the sun, ready for warm weather now!

Recipe
Inspired by Barefoot Kitchen Witch
Ingredients:
Finely grated zest of 2 limes
10 mint leaves, finely chopped
1 cup sugar
5 tablespoons unsalted butter, melted
1/4 cup fresh lime juice
1 tsp strawberry juice concentrate
1 cup strawberries, chopped
2 eggs
1 1/2 cups all-purpose flour
1 teaspoon baking powder
1 teaspoon salt
1/2 cup milk
For syrup:
3/4 cup icing sugar
1/4 cup fresh lime juice
1/4 cup rum
1 Tbsp strawberry juice concentrate
5 mint leaves, finely chopped

Steps:
  1. Preheat oven to 350F/175C. Butter a 8" x 4" loaf pan and set aside. 
  2. Combine lime zest, mint, and sugar in a bowl and rub with a back of a spoon to release oils in the lime zest and mint and set aside.
  3. Combine flour, baking powder and salt and set aside. 
  4. Mix the butter into the sugar mixture on high speed until light and fluffy. 
  5. Add 1/4 cup lime juice and 1tsp strawberry juice concentrate, followed by eggs. Beat until smooth. 
  6. Alternating between the flour mixture and the milk, blend these into the mixture in the bowl. 
  7. Pour the batter into the greased loaf pan, place on middle rack in the oven and bake for about an hour, or until a toothpick inserted in the center comes out clean. 
  8. While the loaf is baking, combine the syrup ingredients until sugar is completely dissolved. 
  9. When the loaf comes out of the oven, pour the syrup evenly over the top. Let the loaf cool in the pan for an hour before removing.


Joseph Joseph Compact Herb Chopper [Product Review]

I couldn't wait to try out this product. I first saw it a few years ago and always thought about buying it but never did for some reason. I wish I would have just bought it back then, I loved it! Joseph Joseph design quality products and this is another one of their great ideas. Here are the reasons why I loved it:

1. It has great design practicality, the chopper blades are stored in the chopping pod.

2. The shape of the chopping pod  ensures that whatever you are chopping stays on top of the pod. 

3. The blades are sharp and it feels comfortable in the hand whilst chopping away.

4. There are 4 non slip little rubber feet that keep the pod firmly in place even when chopping. 

5. I love the look of it, modern and easy to store.

I used the chopper for my latest recipe and it worked great for it. Can you guess what I made from the 2 ingredients above? Check back later in the week to find out. If you would like to buy one of these choppers for yourself or a gift for someone, head on over to www.find-me-a-gift.co.uk. They have a great range of Joseph Joseph products and lots of other goodies.

*This product review is brought to you by www.find-me-a-gift.co.uk, all opinions stated in this post are my own.*

Cookie Dough Bites [vegan]

I love cookie dough and when I came across this one I couldn't wait to make it as my other half has recently become a vegan. You would never know these were vegan though unless I told you. I think people get hung up on the word vegan and think you are on some weird diet. No weird ingredients in this recipe. I already had all the ingredients for these simple to make bite size treats. So even though I am not a vegan, I am going to try out more vegan recipes. These were a good one to start out with and if you don't have vegan margarine use whatever margarine or butter you have and your favorite chocolate. It was very hard not to just eat this dough straight from the bowl. My brain is now thinking about different ways I could use the cookie dough... Cookie Dough Brownies? 


Recipe
Courtesy of Chef Chloe
Ingredients:
½ cup Vegan Margarine
¾ cup Light Brown Sugar, packed
¼ tsp Salt
1 tbsp Pure Vanilla Extract
2 tbsp Water
1 ¼ cups Plain Flour
½ cup Mini Dark Chocolate Chips
340g (12oz) Dark Chocolate


Steps:
  1. Line two baking sheets with parchment paper or tin foil.
  2. Using a mixer, beat margarine, brown sugar, salt, vanilla, and water until combined. Add flour and beat until incorporated. Fold in mini chocolate chips. Cover dough and refrigerate for 1 hour.
  3. Roll chilled dough into 1-inch balls with the palms of your hands. Place on prepared baking sheets. Freeze for 15 minutes.
  4. Melt the remaining chocolate in a double boiler or microwave. Let cool to room temperature. Remove one tray of cookie dough balls from the freezer. Dip each ball into the melted chocolate and remove using two forks. Place the coated balls back onto the baking sheet and transfer to the refrigerator. Repeat with the second tray of cookie dough balls. 
  5. Chill until the chocolate is set, about 20 minutes. Store in refrigerator until serving. 
  6. Enjoy!
The chocolate had a bit of frost on it in the pictures as I left them in the freezer overnight... once the chocolate thawed it looked darker like in the last picture. They were very yummy!

Chocolate BlogHop: Red Velvet Brownies

I've been experimenting with brownies lately and couldn't wait to try making Red Velvet Brownies. My last attempt at making brownies didn't go so well and I really didn't want to mess with my original recipe this time around. This is my first attempt at making something "red velvet" and I wanted it to be similar to a red velvet cupcake with cream cheese frosting. My only problem was I had no idea how much red food coloring gel to use. I looked up tons of recipes but they were all different to mine and all used different amounts of color. I could have followed a different recipe but I wanted these to be based on my quick easy brownies. I feel I used enough red coloring gel but it didn't show though on the pictures unless I used the flash, see the picture after the jump to see the true redness of these red velvet brownies! These really did turn out great, I loved the cream cheese frosting on top of the brownies. These would make a great Valentine's Day treat.

February is #chocolatelove month!

Please join in on the #chocolatelove fun by linking up any chocolate recipe from the month of February 2012. Don't forget to link back to this post, so that your readers know to come stop by the #chocolatelove event! The twitter hashtag is #chocolatelove :). Make sure to check out all the co-hosts below.

Recipe 
Ingredients: 
Brownies:
1/2 cup butter, melted
1 cup white sugar
2 eggs
1/3 cup unsweetened cocoa powder
1 tsp vanilla extract
1 tsp red food coloring gel
1/2 cup plain flour
1/4 tsp baking powder
1/4 tsp salt
Frosting:
inspired by the pink whisk
70g butter
200g cream cheese
400g icing sugar
1 tsp vanilla extract

Steps: 

  1. Preheat oven to 350F/175C. Grease a 9x9 inch baking pan.
  2. In a medium bowl, mix together the butter and sugar. Beat in eggs, one at a time. 
  3. In a small bowl, mix together cocoa powder, vanilla, and red food coloring gel. Press the gel into the cocoa until you can no longer see it and there are no big lumps. Mix thoroughly into the egg mixture.
  4. Combine flour, baking powder, and salt; gradually stir into the egg mixture until well blended. Spread the batter evenly into the prepared pan.
  5. Bake for 25 to 30 minutes, or until the brownie begins to pull away from edges of pan. Let cool on a wire rack before cutting into squares.
  6. In a medium bowl, cream together the butter and cream cheese until it is well combined. 
  7. Add in the vanilla and 100g of icing sugar until fully mixed in. Keep adding 100g at a time until it is all added in. 
  8. Place the frosting in the fridge until the brownies are completely cooled and ready to decorate. 


Co-hosts:


In this picture you can see the redness of these brownies. In person, they looked red and with the flash on it really showed, just wished it showed in the pictures above.

Caramel Banana Brownies

I've been wanting to try out this idea ever since I did my Quick Easy Brownies post last month. I love caramel and bananas and thought it would be a great addition to my brownie recipe. I mashed a couple of bananas up with half a cup of caramel and swirled it into the brownie mixture. I adjusted the cooking time and hoped for the best. They came out looking great and I couldn't wait for them to cool so I could try it out. So it was time for a taste test... and well they tasted DISGUSTING!! I don't know what went wrong but it didn't work. No new recipe to share with this post, but am hoping someone out there has made caramel banana brownies or something similar and it turned out successful. If so, please share it in the comments section. I have one more brownie recipe planned and hope that one turns out ok! If not I'm just sticking with my original recipe as those tasted great!


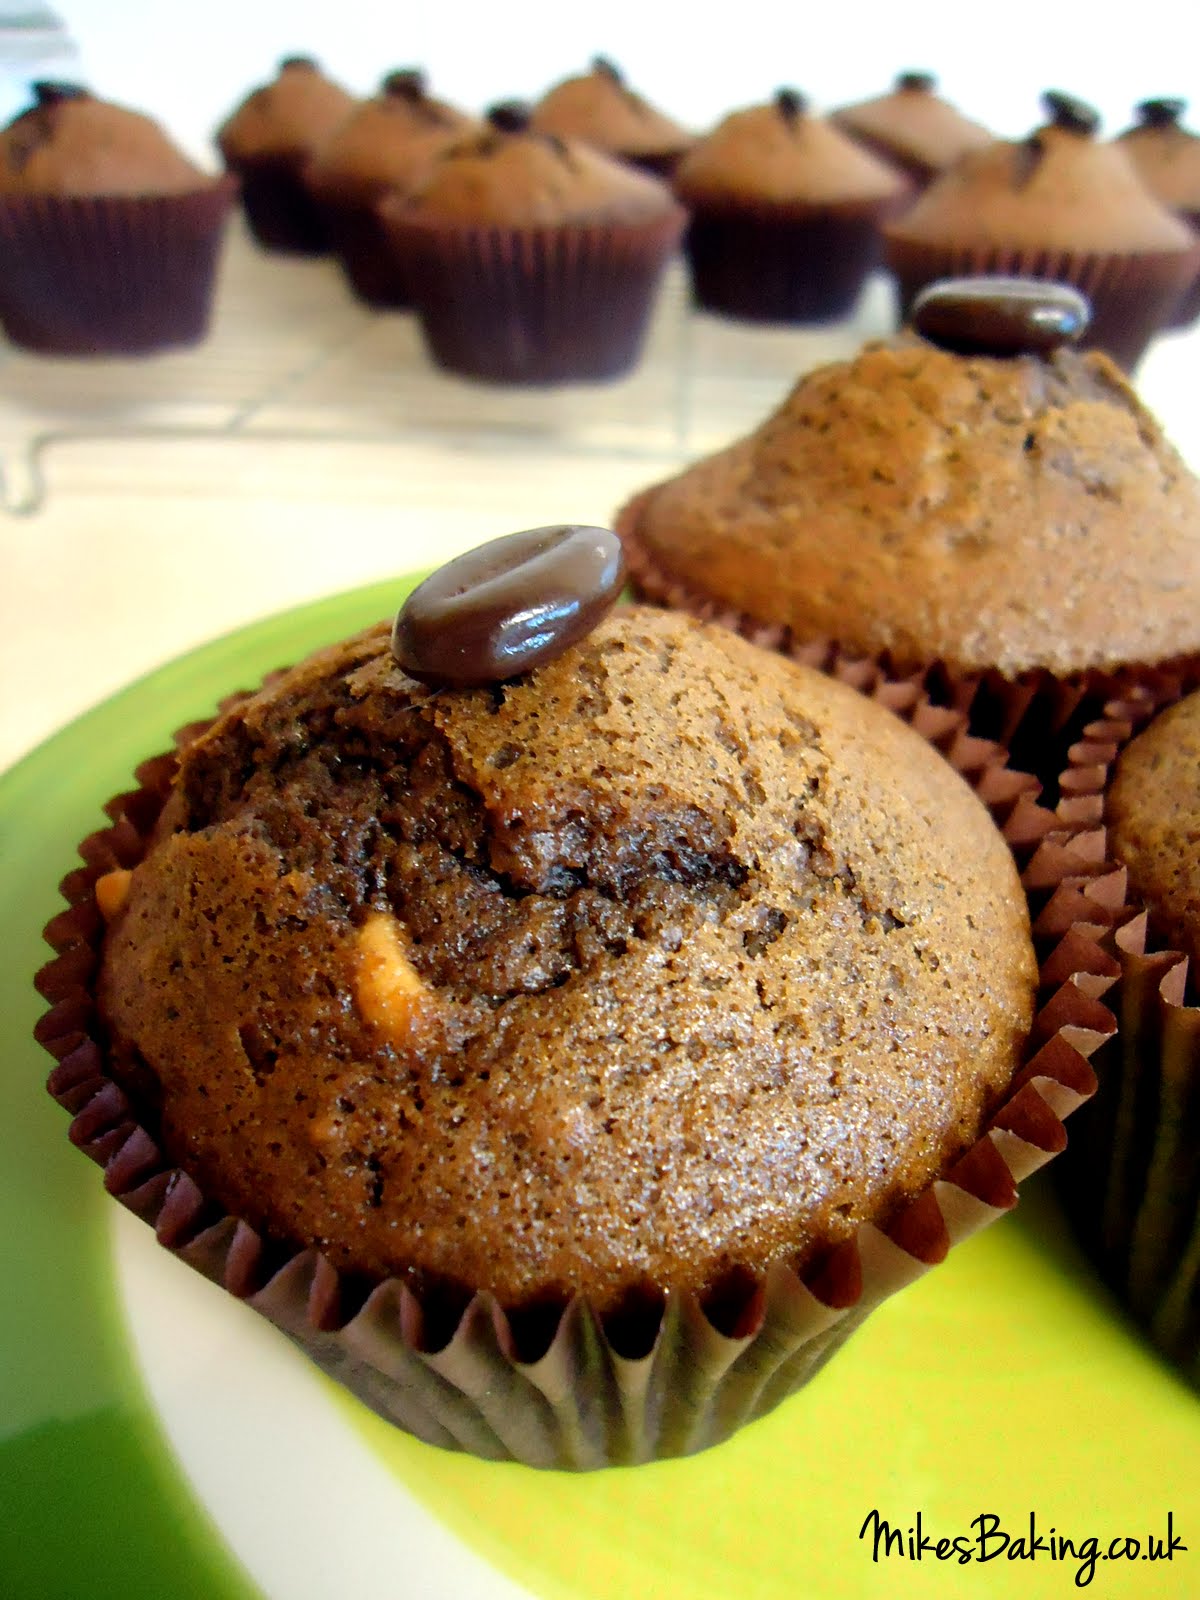
Muffin Monday: Peanut Butter Mocha Muffins

I missed the last 2 Muffin Mondays but glad to be back for this great recipe! Espresso, chocolate, and a little peanut butter thrown in... what's not to like?! The perfect little treat to start the week right! I would use this recipe as a base recipe to make up your favourite latte muffin creation. Next time I will have to try making a Nutty Irishman Latte Muffin... espresso, chocolate, hazelnut, and Irish cream. Yummm!


Happy Muffin Monday!


Muffin Monday is an initiative by Baker Street. A culinary journey of sharing a wickedly delicious muffin recipe every week. Drop in a quick line to join her on her journey to make the world smile and beat glum Monday mornings week after week. 


Recipe
Inspired by Bon Appétit
Ingredients:
1/4 cup hot water
1 tbsp instant espresso powder
1/2 cup buttermilk
1/2 cup vegetable oil
2 large eggs
1 tsp vanilla extract
1 3/4 cups all purpose flour
1/2 cup sugar
1/2 cup light brown sugar, packed
3 tbsp unsweetened cocoa powder
1 tsp baking powder
1 tsp baking soda
1 tsp salt
1 1/2 cups peanut butter chips

Steps:
  1. Preheat oven to 375°F/190°C. Line muffin pan with twelve paper liners. 
  2. Stir 1/4 cup hot water and espresso powder in medium bowl until espresso powder dissolves. 
  3. Add buttermilk, oil, eggs and vanilla and whisk until well blended. Mix flour, sugar, brown sugar, cocoa, baking powder, baking soda and salt in large bowl. 
  4. Add buttermilk mixture and stir just until combined. Mix in chocolate chips and pecans.
  5. Divide batter equally among prepared muffin cups. 
  6. Bake until tester inserted into center of muffins comes out clean, about 20 - 25 minutes. 
  7. Transfer muffins to rack and cool.

Crispy "Seaweed" with Spicy Peanut Garnish

I called this Crispy "Seaweed" but it actually is crispy kale but reminded of the fried seaweed you can order at a Chinese restaurant. I never thought of making something similar at home but was inspired by Junia and Rebecca to try this out. I wanted to add my own little touch to this simple recipe and came up with a Spicy Peanut Garnish to sprinkle over the crispy kale. This quick snack tasted great!! I will definitely be making this again... and again! The garnish makes quite a lot, so it depends how much you would like to sprinkle on but any leftovers just save for the next time you make some crispy "seaweed".

Recipe
Inspired by Mis Pensamientos
Ingredients:
200g Sliced Curly Kale
3tsp Extra Virgin Olive Oil
Sea Salt, to taste
Spicy Peanut Garnish:
1/3 cup Roasted Peanuts
1/4 cup Brown Sugar
1tsp Dried Chopped Garlic
1tsp Dried Red Chilli Flakes
Splash of Toasted Sesame Oil

Steps:
  1. PREHEAT the oven to 375F/190C.
  2. CUT the washed and dried kale into evenly bite size pieces. Get rid of any thick stalks.
  3. MASSAGE the olive oil all over the kale and spread evenly onto two baking sheets. Sprinkle over a little salt.
  4. BAKE for 10 minutes then carefully mix the kale up a little bit and place back in oven for about 5 minutes.
  5. USING a mini chopper, place in all the ingredients of the spicy peanut garnish and blitz until it is a crumbly texture.
  6. LET the kale cool on the baking sheets and then place into a small serving bowl.
  7. SPRINKLE the spicy peanut garnish over the kale.
  8. ENJOY!


UPDATE: Baking Mad With Eric Lanlard


Tomorrow is the big day! I will be taking part in front of the camera for an episode of Baking Mad with Eric Lanlard filmed in London. It's all happened so quickly and I am very excited for what will be a fun experience! I'm not allowed to reveal what the theme of the episode will be or what I will be baking but it has one of my favourite ingredients in it. The picture to the left shows the leftover mess from when I last made it. I just hope that it comes out nice on Monday. :)

The show will be aired on Channel 4 sometime after March. I will find a way to share the episode on here once it airs.


Citrus BlogHop: Clementine Basil Mojito Loaf Cake

It's BlogHop time! This month we are focusing on Citrus. I had lots of ideas for this month and then came up with this recipe. I was inspired by a couple sources, the blog Barefoot Kitchen Witch for which my recipe is based on and my favorite mojito drink from a local restaurant Benson Blakes. This recipe was easy to whip up and loved the smells even before I baked it! Mojitos are my favorite drink when I go out and I love this loaf cake version. I will have to experiment with other flavor combinations as this loaf cake was amazing!

Please join in on the #citruslove fun by linking up any citrus recipe from the month of January 2012. Don't forget to link back to this post, so that your readers know to come stop by the #citruslove event! Make sure to visit all the other co-hosts below to see their #citruslove recipes.

Recipe
Inspired by Barefoot Kitchen Witch
Ingredients:
Finely grated zest of 2 clementines 
10 large basil leaves, finely chopped
1 cup sugar
5 tablespoons unsalted butter, melted
1/4 cup fresh clementine juice
2 eggs
1 1/2 cups all-purpose flour
1 teaspoon baking powder
1 teaspoon salt
1/2 cup milk
For syrup:
3/4 cup icing sugar
1/4 cup fresh clementine juice
1/4 cup rum
5 large basil leaves, finely chopped

Steps:
  1. Preheat oven to 350F/175C.  Butter a 8" x 4" loaf pan and set aside.
  2. Combine clementine zest, basil, and sugar in a bowl and rub with a back of a spoon to release oils in the clementine zest and basil and set aside.
  3. Combine flour, baking powder and salt and set aside.
  4. Mix the butter into the sugar mixture on high speed until light and fluffy.
  5. Add 1/4 cup clementine juice, followed by eggs.  Beat until smooth.
  6. Alternating between the flour mixture and the milk, blend these into the mixture in the bowl.
  7. Pour the batter into the greased loaf pan, place on middle rack in the oven and bake for about an hour, or until a toothpick inserted in the center comes out clean.
  8. While the loaf is baking, combine the syrup ingredients until sugar is completely dissolved.
  9. When the loaf comes out of the oven, poke holes all over the top with a thin knife and then pour the syrup evenly over the top.
  10. Let the loaf cool in the pan for an hour before removing.

Co-hosted by:  A little bit of everything, Astig Vegan, Baker Street, BigFatBaker, CafeTerraBlog, Cake Duchess, Cakeballs, cookies and more, Elephant Eats, Easily Good Eats, Food Wanderings, Georgiecakes, Hobby And More, Mike's Baking, Mis Pensamientos, No One Likes Crumbley Cookies, Oh Cake, Parsley, Sage, Desserts and Line Drives, Peaches and Donuts, Savoring Every Bite, Simply Reem, Smart Food and Fit, Soni's Food for Thought, That Skinny Chick Can Bake!!!, The Art of Cooking Real Food, The More Than Occasional Baker, The Spicy RD, The Wimpy Vegetarian, Vegan Yack Attack!, Vegetarian Mamma, You Made That?

Rafflecopter

I recently used Rafflecopter for my first giveaway. They made it extremely easy for everyone to enter and for me to manage my giveaway. Rafflecopter has now opened up their giveaway widget for everyone to use and to celebrate they are giving away an  iPad2 and an Amazon Kindle Fire. To thank them for letting me use their widget early I am sharing this with you. Bloggers out there... use Rafflecopter for your next giveaway! :)
a Rafflecopter giveaway The prizes above are from Rafflecopter and entries only open to US/Canadian Residents. Mike's Baking is not running this giveaway and only sharing the greatness that is Rafflecopter.

Muffin Monday: Oreo Muffins

I can't remember the last time I had Oreos. Making these muffins brought back childhood memories when I used to eat Oreos all the time. Dip them in milk, twist them, eat the filling first, or eat it whole. Lots of ways I used to eat Oreos!  These muffins turned out great. I slightly changed the recipe from Food.com. First, I cut the recipe in half as I did not want to have 40 mini muffins, added a little vanilla in the batter, broke the cookies into quarter chunks for the batter, and added an Oreo crumble on top. It made 10 muffins and I was happy with that! 

Muffin Monday is an initiative by Baker Street. A culinary journey of sharing a wickedly delicious muffin recipe every week. Drop in a quick line to join her on her journey to make the world smile and beat glum Monday mornings week after week.
Recipe
Adapted from Food.com - Makes 10 muffins
Ingredients:
1 cup plain flour
1/4 teaspoon salt
1/4 teaspoon baking soda
1/2 teaspoon baking powder
1/2 cup granulated sugar
1/2 cup milk
1/4 cup sour cream
1 egg
1/8 cup butter, melted
1 tsp vanilla extract
10 Oreo cookies , broken into quarters
5  Oreo cookies, coarsely chopped
1 tbsp Sugar

Steps:
  1. Preheat oven to 400F/200C
  2. In medium bowl, combine flour, sugar, baking powder, and salt, set aside.
  3. In small bowl, combine milk, sour cream, vanilla and egg.
  4. Stir the egg mixture in to the flour mixture with butter until just blended.
  5. Gently stir in the 10 oreo cookies broken into quarters.
  6. Coarsely chop 5 oreo cookies and mix with sugar to make crumble.
  7. Spoon batter into muffin pan lined with baking cups and sprinkle with the oreo crumble.
  8. Bake at for 20 minutes. Remove from pan, cool on wire rack.


Happy New Year!

Thank you for visiting my blog, I hope everyone has a great year in 2012!

Now to announce the winner of my Giveaway... and the winner is: Nickie C.!!! Congrats!

a Rafflecopter giveaway

Take a look at my 10 most popular posts of 2011:
  1. kMix vs KitchenAid - I still haven't bought one yet but I leaning towards the kMix.  
  2. Bake a Cake in a... Mug! -Simple quick cake recipe for one that bakes in the microwave!
  3. Grasshopper Pie - Chocolate & Mint... YUM!
  4. Squash BlogHop: Easy Pumpkin Cinnamon Rolls - Part of the BlogHop series focusing on Squash. 
  5. Cake Mug... again! - This cake mug proved to be popular and the add-ins could be anything!
  6. Cookie BlogHop: Cinnamon Palmiers - Another BlogHop and I used cinnamon again! Love cinnamon!
  7. Apple BlogHop: Apple Oatmeal Cookies with Custard Glaze and Butterscotch Pieces - Love BlogHops, I don't usually make cookies but these were very tasty!
  8. Rice BlogHop: Tiramisu Rice Pudding - BLOGHOP! :) Like rice pudding? Tiramisu? Try this recipe out.
  9. Peppermint Creams - Nice little treat... Chocolate & Mint! Very easy to make!
  10. Shane's 26th Birthday - Grape Poke Cake - My 1st time making a poke cake but it was nice and I would definitely try it out again!